
Ready to make your social media planning effortless and visually stunning? Creating and previewing posts with Planoly is quick and straightforward, allowing you to organize your content seamlessly before going live. With just a few clicks, you can design, schedule, and see exactly how your posts will look on your feed, saving time and ensuring a cohesive aesthetic. Whether you’re a social media novice or a seasoned marketer, Planoly simplifies your workflow with its intuitive interface and powerful preview features. In this guide, I’ll show you step-by-step how to create eye-catching posts and preview them like a pro, so you can confidently present your content to the world and keep your feed looking polished and consistent.
To create and preview posts using Planoly, start by uploading your images or videos to the platform, then use the drag-and-drop editor to customize your content with filters, captions, and hashtags. Once your post is ready, you can preview it within the grid view to see how it fits with your overall aesthetic. This allows you to make adjustments before scheduling or publishing directly to your social media accounts, ensuring your feed always stays on point.

How to create and preview posts using Planoly
If you’re looking to manage your social media posts easily, Planoly is a great tool. It helps you organize, create, and plan your content all in one place. This guide will walk you through each step to make posting simple and effective.
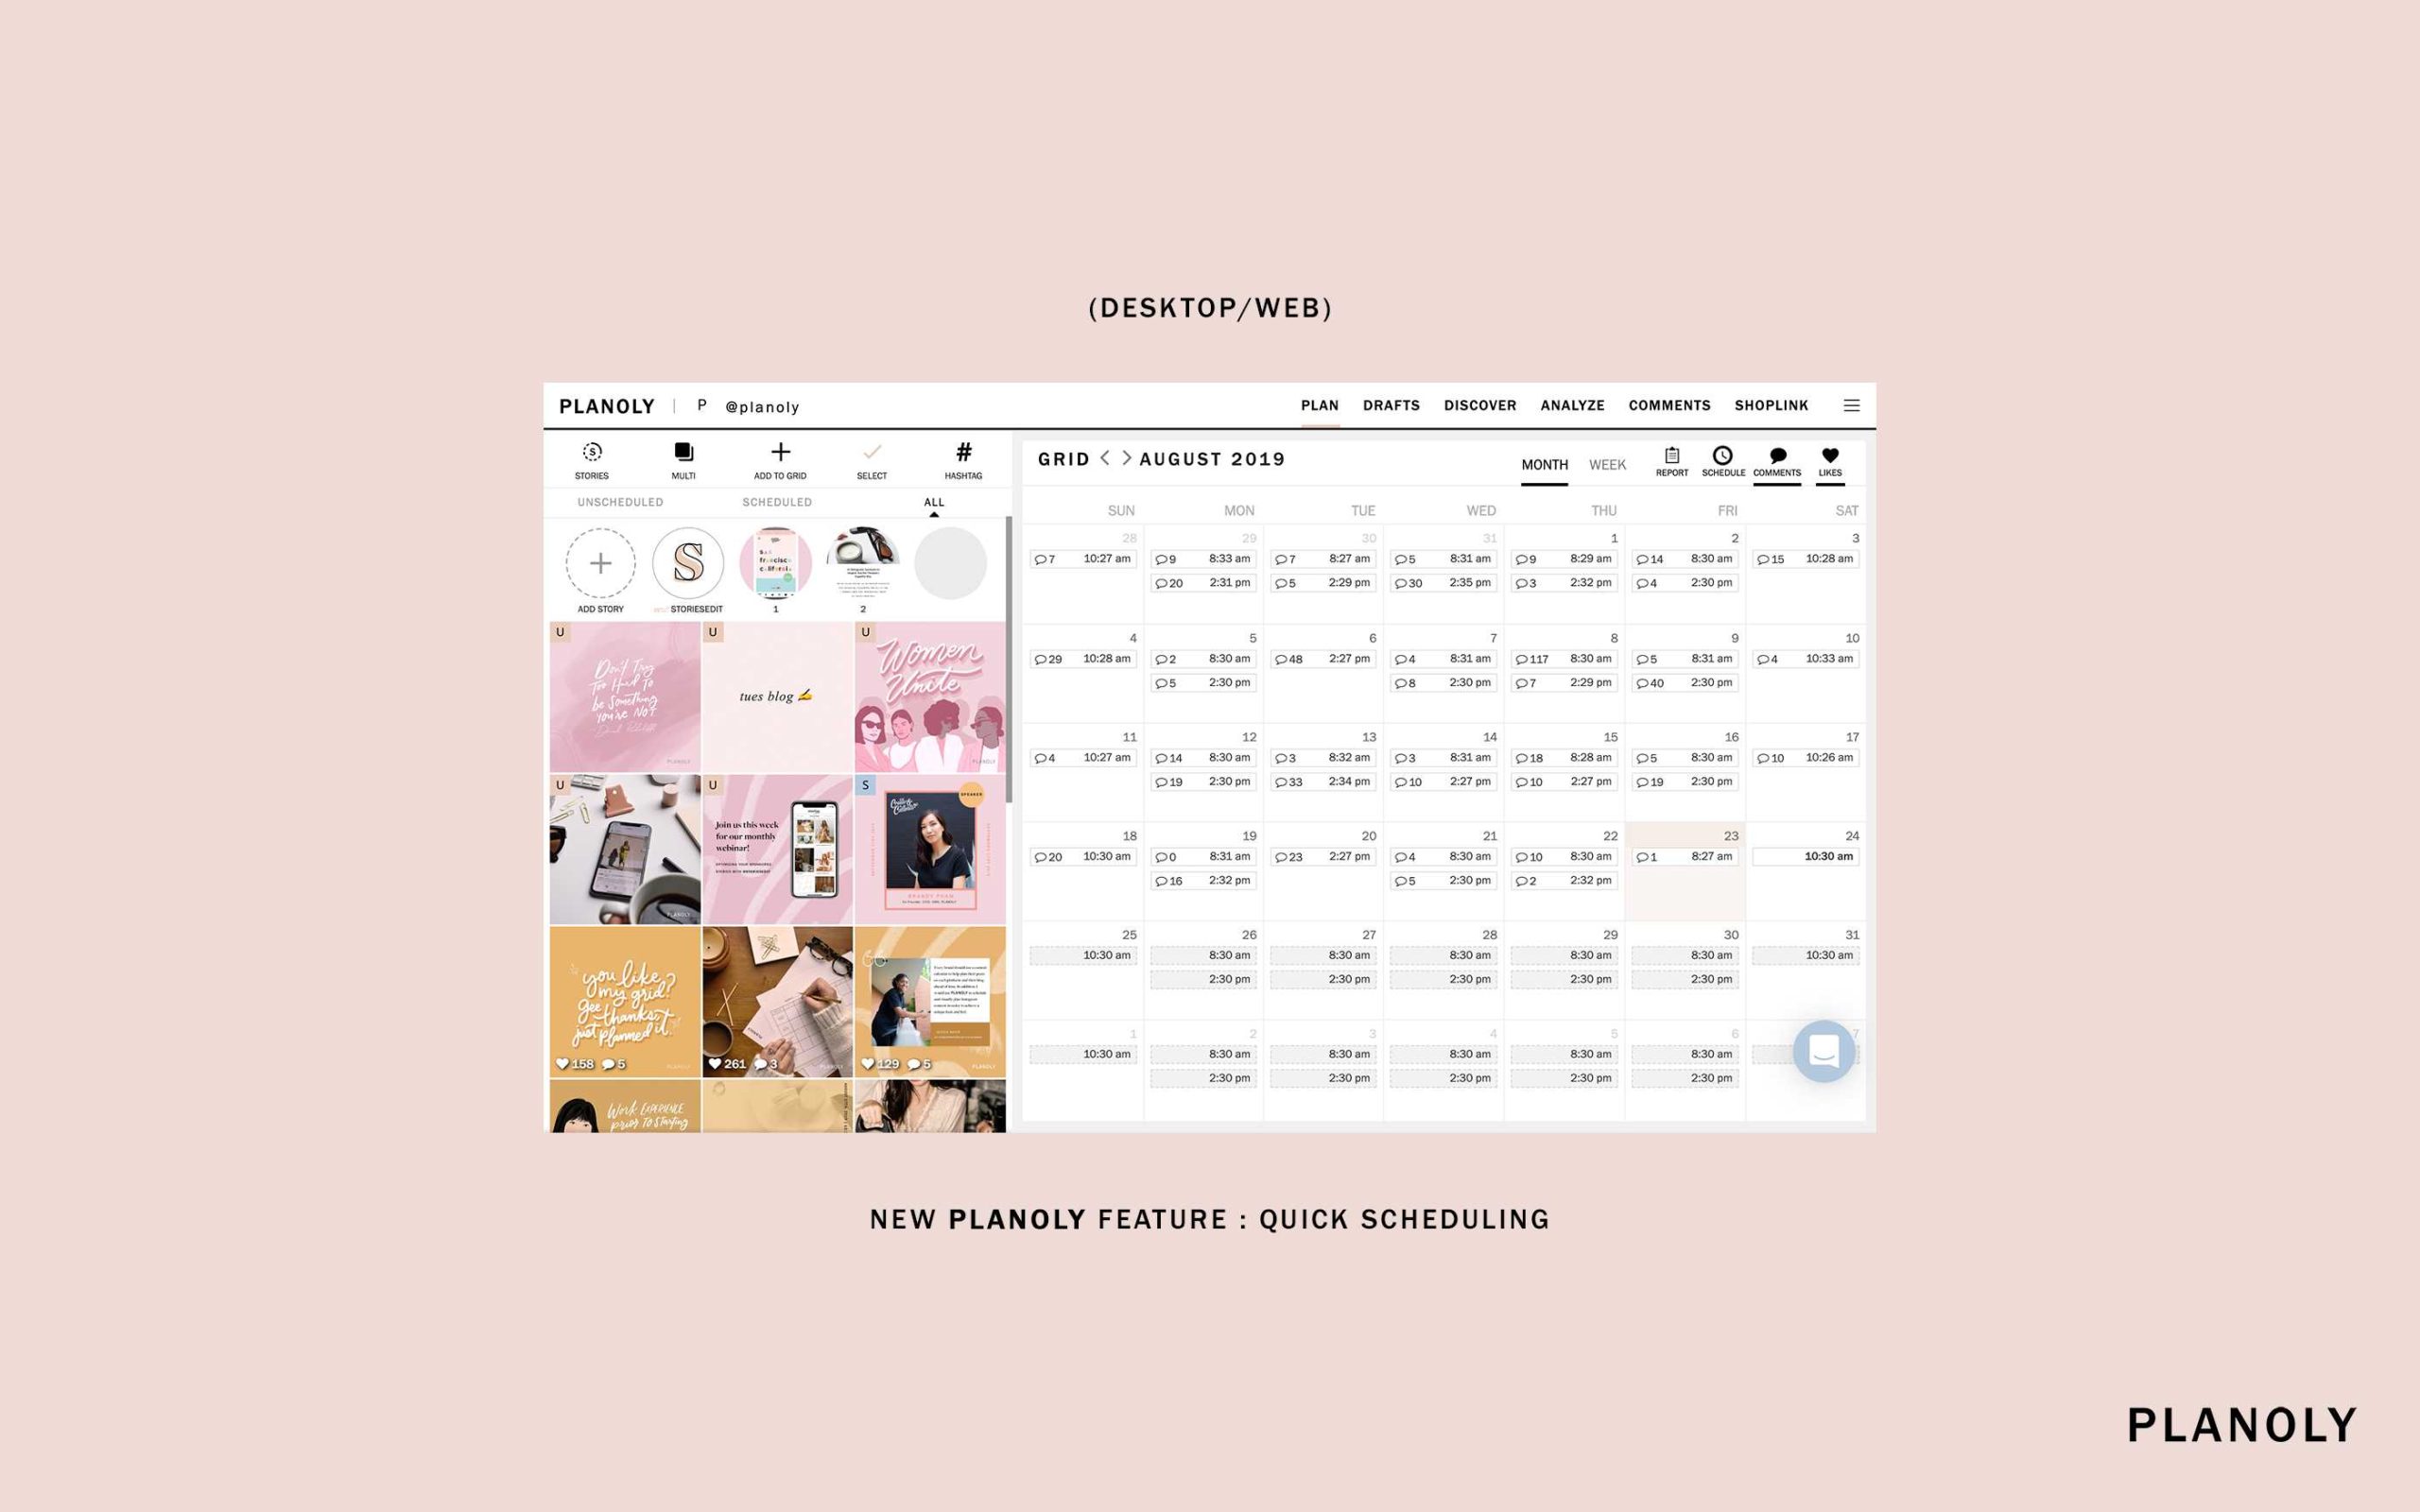
Understanding the Planoly Dashboard
The first thing to do is familiarize yourself with the Planoly dashboard. When you log in, you’ll see your grid where all your posts are displayed. The dashboard shows your scheduled posts, drafts, and the calendar view.
Knowing where everything is helps you navigate smoothly. You can access features like uploading images, writing captions, and scheduling posts from this main area.
Creating a New Post in Planoly
Uploading Your Media Files
Start by clicking the “Create Post” button. This opens a window where you can upload images or videos. You can drag and drop files or select them from your device.
- Select multiple files at once to plan several posts.
- Supported formats include JPEG, PNG, and MP4.
- Ensure your media has the recommended aspect ratios for Instagram or other platforms.
Adding Captions and Details
Once your media is uploaded, you’ll find a text box to write your caption. Use this space to include relevant keywords and engaging language.
- Include hashtags to improve discoverability.
- Tag other accounts if necessary.
- Add location tags to target specific audiences.
Scheduling Your Post
After preparing your post, choose when to publish it. Planoly offers flexible options:
- Immediate posting
- Scheduled date and time Discipline to your content calendar
- Recurrent posts for regular content updates
Using the Drag-and-Drop Planner
Arranging Your Posts
Planoly’s drag-and-drop feature makes it easy to organize your grid. Simply click on a post and move it to the desired spot on your visual planner.
- Check how your feed will look before publishing.
- Maintain a consistent aesthetic by arranging similar content together.
Previewing Your Feed
Preview mode shows how your actual Instagram feed will look once posts go live. This helps you decide if your grid looks cohesive.
- Switch between different device views for better visualization.
- Adjust your post order if the preview isn’t matching your desired layout.
Previewing Individual Posts
Preview Mode Features
Click on any scheduled or drafted post to see a detailed preview. This shows your caption, hashtags, and media as it will appear.
- Check formatting and alignment.
- Make edits to captions or media if needed before publishing.
Using the Mobile Preview
Planoly also offers a mobile view to see how your posts will appear on smartphones. This is important because most audiences view content on mobile devices.
- Ensure your images look good at smaller sizes.
- Adjust captions or media if they appear cut off or misaligned.
Editing Posts Before Publishing
Making Quick Edits
If you notice something off before posting, you can easily edit your draft. Click on the post in your planner or drafts section.
- Change the caption, tags, or location.
- Replace media if necessary.
- Reschedule the post if you want a different time.
Saving as Drafts
If you’re not ready to post, save your work as a draft. This way, you can revisit, edit, or finalize it later.
- Access all drafts from the dashboard.
- Edit multiple drafts to plan future content efficiently.
Best Practices for Post Creation and Preview
Maintaining Consistency
Use the preview tools to keep your feed uniform. Consistent color schemes, content types, and posting styles help build your brand identity.
Using Analytics to Improve Content
Track how your posts perform after publishing. Use these insights to refine your future posts during creation and preview stages.
Planning Content in Advance
Create several posts at once and schedule them ahead of time. Preview each to ensure your overall feed looks appealing and balanced.
Additional Tips for Effective Post Management
- Batch content creation: Prepare multiple posts in one sitting for efficiency.
- Use templates for captions or graphics to save time.
- Regularly review your feed preview to keep your content cohesive and fresh.
Integrating Planoly with Your Workflow
Connecting Your Social Accounts
Link your Instagram, Pinterest, or other social media accounts within Planoly. This allows seamless scheduling and posting.
Synchronizing with Other Tools
Use Planoly alongside tools like Canva for creating graphics or analytics tools to monitor engagement. This creates a smooth content creation process.
Managing Multiple Accounts
If you handle several profiles, Planoly makes it easy to toggle between accounts. Manage and preview posts for each without confusion.
Knowing how to efficiently create and preview posts in Planoly can boost your social media presence. It saves time, keeps your feed looking professional, and gives you control over your content. Practice these steps regularly, and you’ll find posting becomes much simpler and more effective.
How to Visually Preview Posts with PLANOLY
Frequently Asked Questions
How can I upload images and videos for my posts in Planoly?
To upload images and videos, click on the “Create” button or the “+” icon within the Planoly dashboard. Select the media files from your device, and they will appear in your media library. You can then drag and drop these files into your post layout for easy organization and editing before scheduling or previewing.
After selecting or uploading your media, navigate to the caption section. Type in your message, add relevant hashtags, and tag users if necessary. This allows you to craft engaging captions that accompany your visuals. Once done, you can save the draft or continue to the preview step to see how the post looks.
How do I rearrange the order of multiple images within a carousel post?
When creating a carousel post, you can drag and drop individual images to rearrange their order. This process helps you control the sequence in which images appear in your post. Preview the carousel afterward to ensure the flow aligns with your viewing and storytelling goals.
What options are available to customize the appearance of my post before publishing?
Planoly provides editing tools such as filters, cropping, and adjusting brightness or contrast to enhance your images. You can also add overlays or stickers if available. These options help you fine-tune your visuals to match your brand’s aesthetic before previewing and scheduling your post.
Once you’ve prepared your post, click on the preview feature within Planoly. This feature displays how your content will look once published, including how images and captions appear on the platform. It allows you to make final adjustments to ensure your post looks polished and coherent before publishing.
Final Thoughts
Creating and previewing posts using Planoly simplifies your social media management. First, upload your images and add captions directly within the platform. Use the drag-and-drop feature to arrange your content easily. Preview your posts in the planner to see how they will appear on your feed.
Summing up, ‘How to create and preview posts using Planoly’ involves straightforward steps that save time and ensure your content looks perfect before posting. This process keeps your social media organized and visually appealing, making your workflow more efficient.