
To effortlessly plan your social media posts, Meta Business Suite is your best friend. With just a few clicks, you can schedule your content to go live at optimal times, saving you time and ensuring consistent engagement. Whether you’re managing multiple pages or just want to streamline your posting process, it’s a game-changer. Quickly learn how to set up your content schedule so your audience stays engaged without you having to be online all the time.
Meta Business Suite allows you to easily schedule content by creating your posts in advance and choosing specific times for them to publish automatically. You can do this directly from the dashboard, whether you’re on desktop or mobile, making content management seamless and efficient.
Getting your content scheduled on Meta Business Suite is straightforward. Simply select or create your post, click the schedule option, choose your preferred date and time, and confirm. This way, your posts will be published at exactly the right moments to maximize reach and engagement.

How to schedule content with Meta Business Suite
Scheduling content is a smart way to stay consistent on social media. Meta Business Suite makes this easy by letting you plan your posts in advance. It saves time and helps keep your audience engaged. In this guide, we will go through every step to help you get started with scheduling your content effectively.
Understanding the benefits of scheduling content
Scheduling your posts offers many advantages. It allows you to maintain a regular posting schedule without being online all the time. You can plan your content around important events or product launches. This consistency builds your audience’s trust and keeps your brand active.
Another advantage is the efficiency it provides. Instead of posting manually every day, you prepare everything beforehand. This way, you can focus on creating quality content rather than worrying about timing. Overall, it helps you grow your social media presence with less stress.
Getting started with Meta Business Suite
First, you need to access Meta Business Suite. Visit business.facebook.com or open the app on your device. Log in with your Facebook or Instagram account linked to your business. If you haven’t set up your business profile, take a moment to complete that first.
Once you’re logged in, familiarize yourself with the dashboard. The main menu shows options like Posts, Inbox, and Insights. To schedule content, focus on the ‘Posts’ section, which offers all the tools you need.
Before scheduling, ensure your Facebook and Instagram accounts are connected. Click on Settings and then on Accounts. Here, you can add or manage your linked pages and profiles.
This connection allows you to manage both platforms within Meta Business Suite. You can then choose where to post your content and schedule it for both Facebook and Instagram simultaneously.
Creating a new post for scheduling
Start by clicking on the ‘Create Post’ button. You’ll see options to add text, images, videos, links, or stickers. Make your content engaging and relevant to your audience.
Write a compelling caption and include any hashtags or tags to increase visibility. You can also preview how your post will look on each platform before scheduling.
Choosing the scheduling option
After creating your post, look for the arrow next to the ‘Publish’ button. Click on it, and select ‘Schedule.’ A calendar will appear, allowing you to choose the date and time for your post.
Pick the day and time you want your content to go live. Ensure that it aligns with your audience’s most active hours for maximum engagement.
Adjusting the scheduling details
Meta Business Suite offers flexible options for scheduling. You can set recurring posts, or select specific times for different days. Use the calendar and clock tools to fine-tune your posting schedule.
Review your scheduled posts regularly. Make any necessary adjustments to optimize your posting times based on performance data.
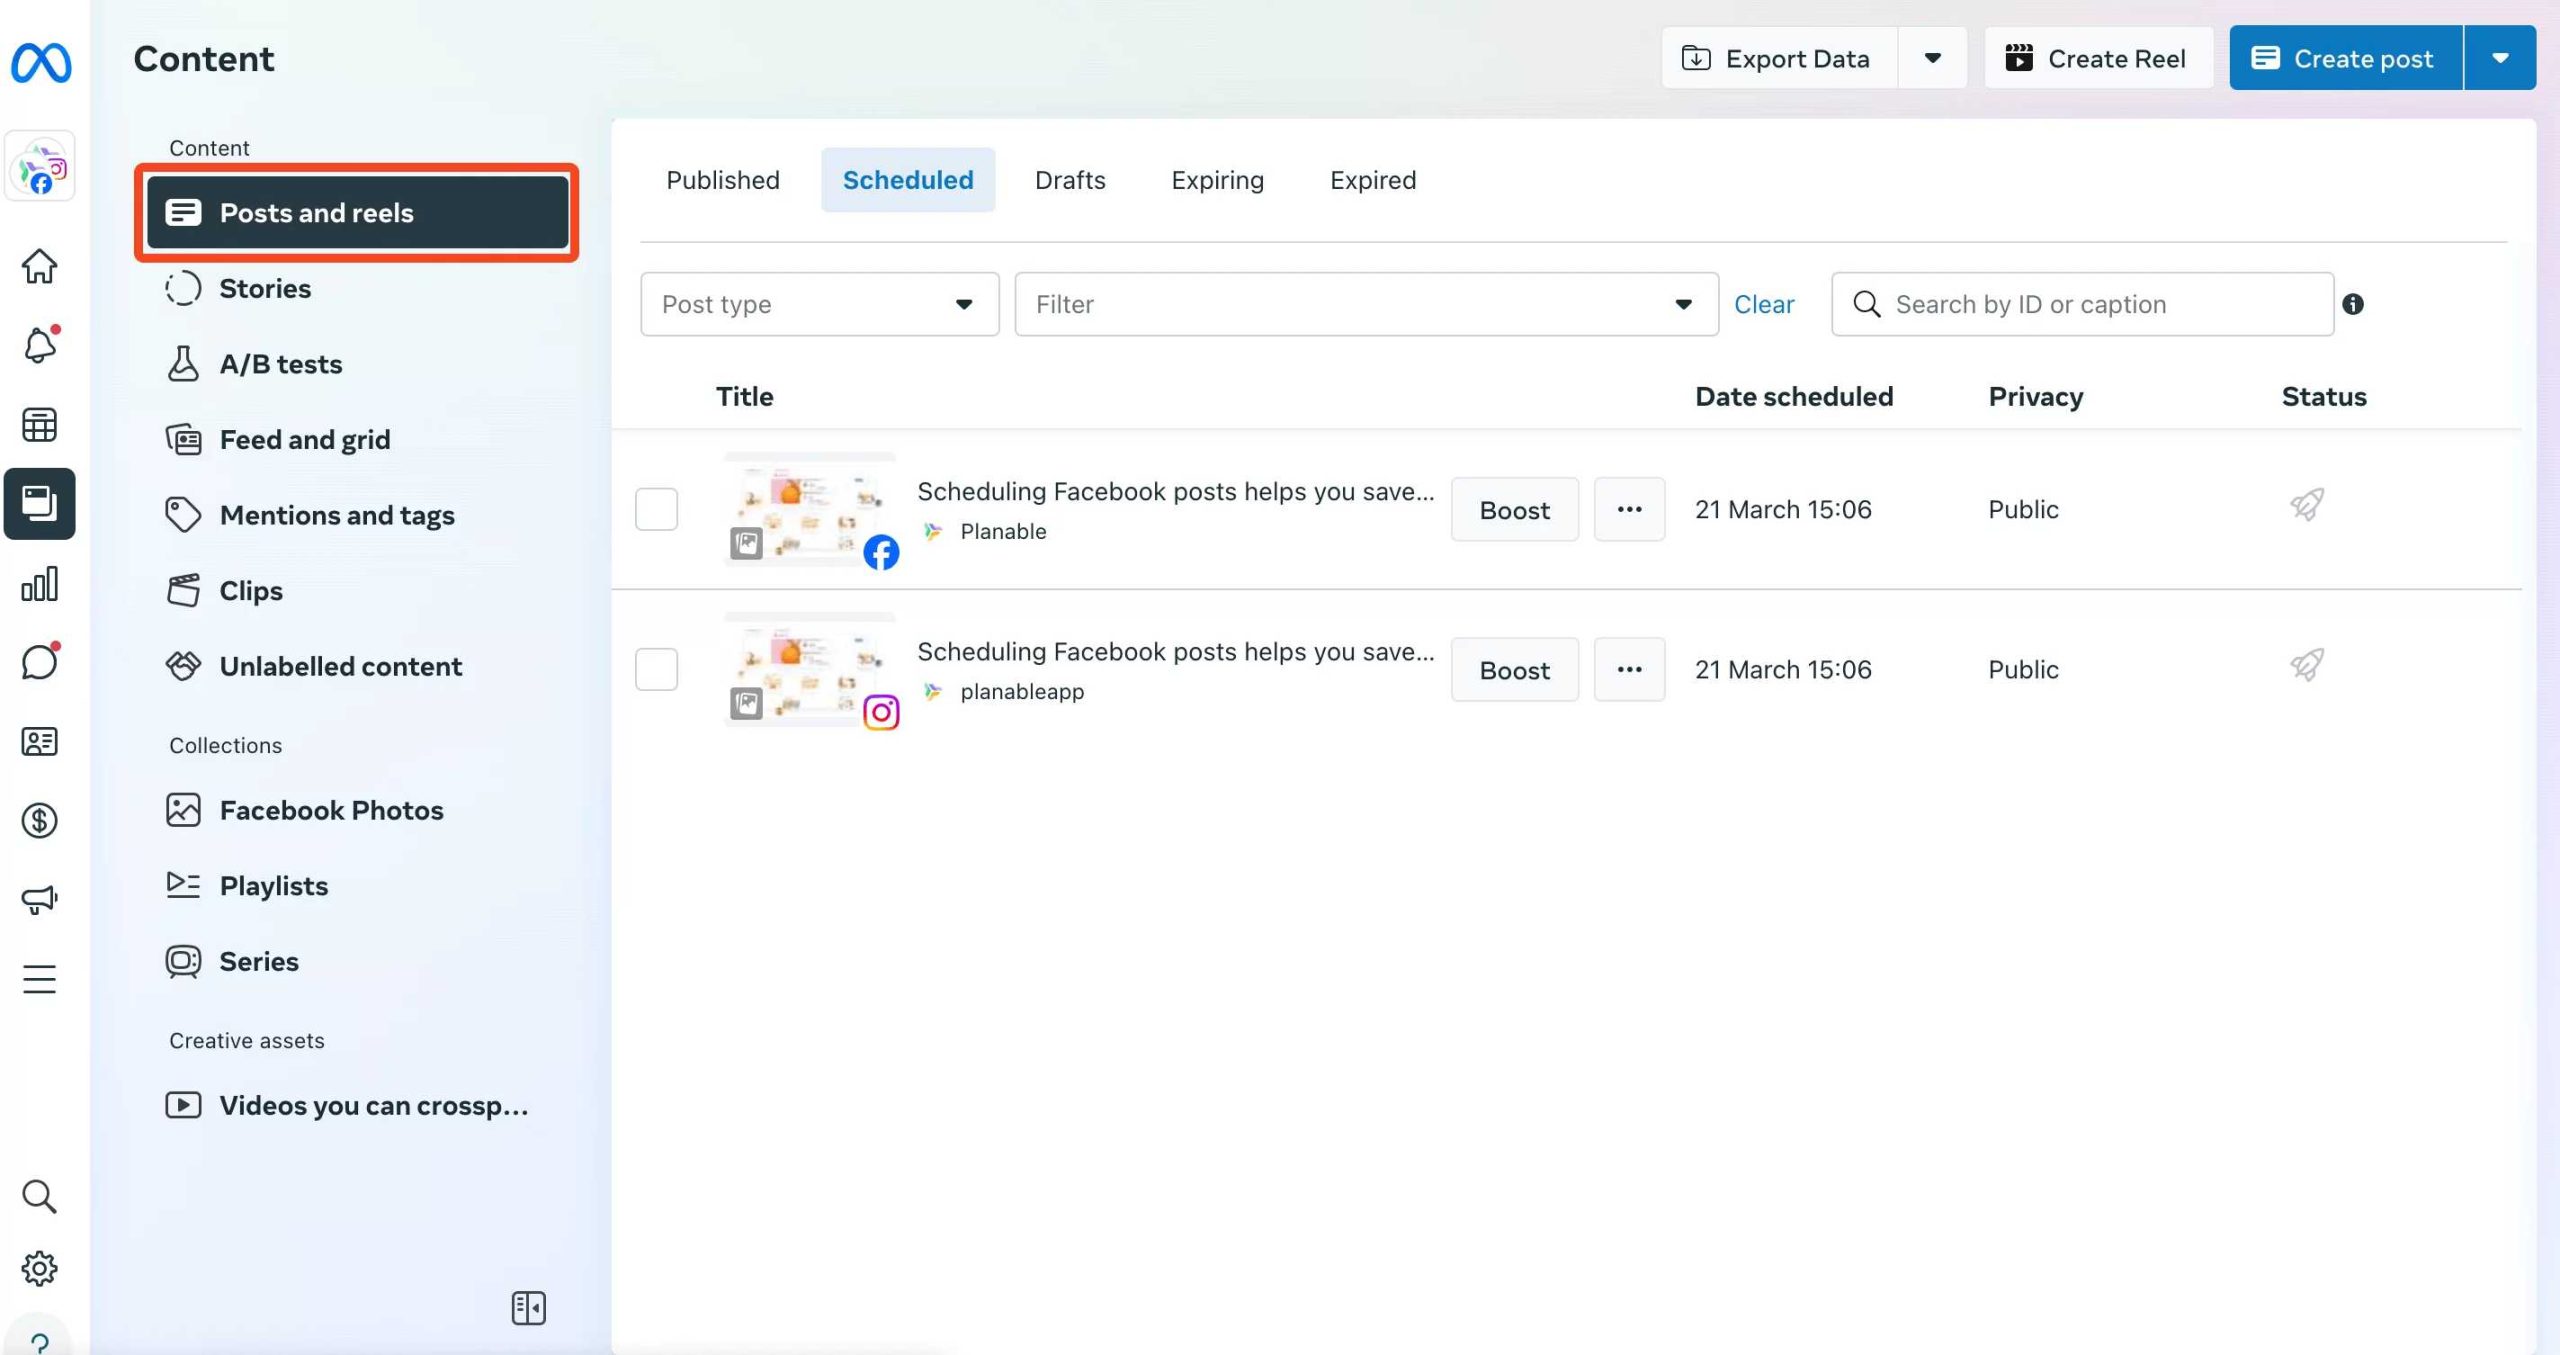
Managing scheduled posts
To see all your scheduled content, go to the ‘Content Calendar’ tab. Here, you can view, edit, reschedule, or delete upcoming posts. This visual overview helps you stay organized and avoid overlaps.
Click on any scheduled post to make quick edits if your plans change. The ability to modify scheduled posts ensures your content stays relevant and timely.
Using bulk scheduling for efficiency
If you have a lot of content to post, bulk scheduling can save you time. Prepare multiple posts in advance and upload them at once. Meta Business Suite allows you to do this through a CSV file or a variety of third-party tools.
Organize your content by themes or campaigns. This approach helps keep your messaging consistent and targeted to your audience.
Tips for effective content scheduling
- Post at optimal times: Use insights and analytics to identify when your audience is most active.
- Maintain variety: Mix different types of content such as images, videos, and links to keep your feed interesting.
- Plan around events: Schedule posts around holidays, product launches, or special campaigns for better impact.
- Monitor engagement: After scheduling, track how your posts perform to refine your timing and content strategy.
Integrating analytics to improve scheduling
Meta Business Suite provides valuable data on post performance. Use this information to adjust your future scheduling. Focus on publishing more content during high-engagement periods.
Check the ‘Insights’ tab regularly. Analyzing metrics such as reach, clicks, and comments helps you understand what works best for your audience.
Addressing common challenges in scheduling
Some users face issues like incorrect time zones or missed posts. Double-check your time zone settings in the account preferences. Always preview your posts before scheduling to avoid errors.
If you experience technical glitches, ensure your app or browser is up to date. Clear cache and restart if necessary. For persistent issues, consult Facebook’s help center or support team.
Effectively scheduling your content with Meta Business Suite can significantly boost your social media management. It simplifies planning, saves time, and helps keep your audience engaged. By understanding the tools and tips outlined here, you can create a consistent and impactful online presence.
How To Schedule Posts To Instagram And Facebook With Meta Business Suite
Frequently Asked Questions
Can I schedule different types of content within Meta Business Suite?
Yes, Meta Business Suite allows you to schedule various content types, including images, videos, links, and text updates. When creating a post, you can choose the media or content format that fits your message and set a specific time for it to go live. This helps you plan your content calendar efficiently and ensures consistent posting across your pages and profiles.
What steps should I follow to set a specific date and time for my post?
Start by selecting the content you want to publish and open the scheduling options. Choose the “Schedule” button, then pick your preferred date and time from the calendar interface. Confirm your selections, and Meta Business Suite will automatically publish your content at the scheduled moment. Double-check your time zone settings to ensure your post appears at the correct local time.
Can I edit or reschedule a post after setting it up?
Yes, you can easily modify your scheduled posts. Navigate to your scheduled content in Meta Business Suite, select the post you want to update, and choose the edit option. You can change the content, date, or time accordingly. If you decide to post immediately instead of the scheduled time, you can also do that with a simple option within the post settings.
Is it possible to schedule multiple posts at once?
Meta Business Suite offers a bulk scheduling feature where you can upload multiple posts simultaneously. Prepare your content in a spreadsheet or CSV file, including details like captions, media, and scheduled times. Import the file into the platform, review your entries, and then schedule all posts in one go, saving time and ensuring your content calendar stays organized.
How does scheduling content impact engagement on my pages?
Scheduling content allows you to plan and publish posts during peak activity times for your audience. By posting consistently at optimal moments, you can increase visibility, engagement, and interaction with your followers. Additionally, it helps you maintain a steady flow of content without the need to manually post in real-time, giving you more control over your social media strategy.
Final Thoughts
Pour planifier du contenu avec Meta Business Suite, commencez par accéder à l’interface de gestion. Sélectionnez la page ou le compte pour publier. Cliquez sur “Créer un post” et ajoutez votre contenu.
Vous pouvez alors choisir l’option de planification. Définissez la date et l’heure auxquelles vous souhaitez que votre publication soit publiée. Vérifiez les détails avant de confirmer la programmation.
How to schedule content with Meta Business Suite simplifie la gestion de vos publications. En suivant ces étapes, vous optimisez votre présence en ligne et gagnez du temps efficacement.